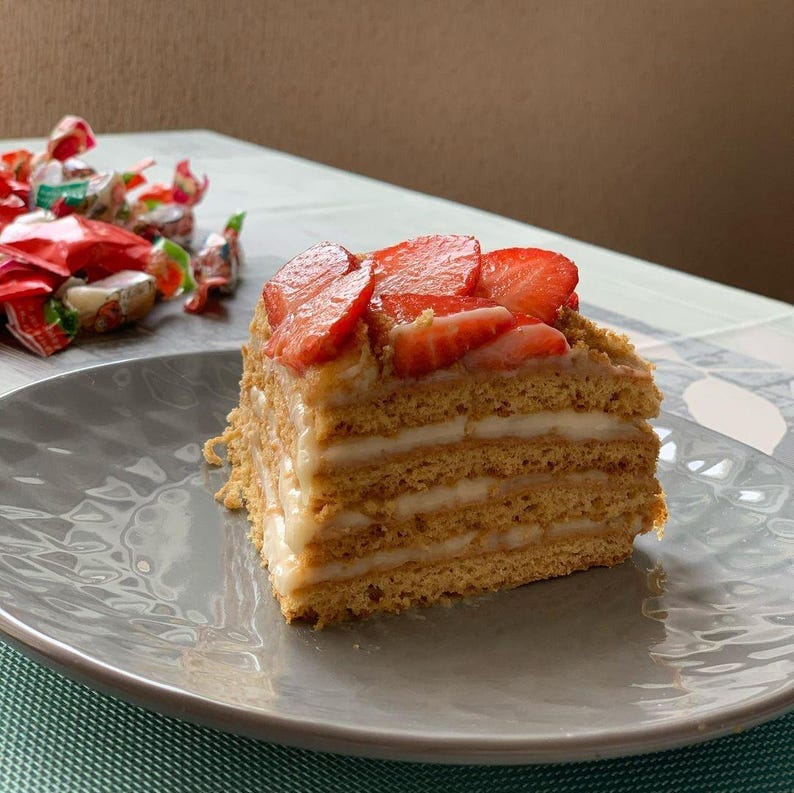
Medovik Cake: A Classic Honey Layer Cake You’ll Love to Bake
There’s something truly magical about Medovik cake. With layers of delicate honey-infused sponge and creamy, tangy filling, it’s a dessert that’s rich in flavor, yet not overwhelmingly sweet. Originating from Russia and beloved throughout Eastern Europe, Medovik, or “Honey Cake,” is a time-honored treat often served at special gatherings. If you’ve ever wanted to recreate this dessert at home, this guide will walk you through the process, from ingredients to assembly, with tips to make it perfect every time. Whether you’re a seasoned baker or just starting out, Medovik cake offers an approachable and rewarding baking experience.
Table of Contents
What is Medovik Cake?
Brief History and Origins
Medovik, also known as Russian Honey Cake, dates back over 200 years to the time of Russian Empress Elizabeth Alexeievna. Legend has it that her chef created a layered honey cake that won her favor, and the dessert became popular across the Russian Empire. Over the years, this honey cake has evolved and adapted, with variations emerging across different regions. Today, Medovik remains a staple in Eastern European bakeries and homes, celebrated for its unique flavor and beautiful layers.
Why Medovik Cake is Unique
Medovik cake stands out because of its distinctive honey flavor and the way it blends sweetness with subtle tanginess. The honey used in the dough adds a warm, caramel-like flavor, while the creamy filling (often made with sour cream or a similar ingredient) balances the richness with a slight tang. This combination creates a cake that’s both light and indulgent—a satisfying treat for those who enjoy a complex, layered dessert.
Ingredients and Equipment for Medovik Cake
To get started, let’s go over the key ingredients and tools you’ll need to make this delicious cake.
Ingredients List
Here’s everything you’ll need for the cake:

Honey Layer Cake Medovik
Ingredients
- 1/3 cup Honey Adds flavor and sweetness
- 1 cup Sugar Provides sweetness
- 3 large Eggs Binds the ingredients together
- All-purpose flour 3 cups Forms the structure of the cake layers
- Baking soda 1 teaspoon Helps the cake layers rise
- Sour cream (or similar) 2 cups Creates a creamy, tangy filling
- Vanilla extract 1 teaspoon Enhances flavor
Each of these ingredients plays a crucial role in the flavor and texture of the cake. For example, honey serves as the star ingredient, infusing each layer with warmth, while sour cream adds richness and contrast.
Essential Tools
You’ll also need a few basic tools:
- Mixing bowls: for combining wet and dry ingredients
- Hand mixer or stand mixer: to cream butter and sugar
- Baking sheet: for baking the thin layers
- Offset spatula: to help spread the filling evenly between layers
- Wire rack: for cooling the baked layers
These tools will help you create a cake that looks as good as it tastes.
How to Make the Best Medovik Cake
Now that you’re familiar with the ingredients, let’s dive into the process of making Medovik cake from scratch. Each step is straightforward, but taking your time to follow the instructions will ensure your cake comes out perfectly.
Step-by-Step Recipe
1. Preheat your oven
Set your oven to 350°F (175°C) and line a baking sheet with parchment paper.
2. Mix the dry ingredients
In a medium bowl, combine flour and baking soda. Mixing these dry ingredients first will ensure they’re evenly distributed throughout the dough.
3. Heat the honey, sugar, and butter
In a saucepan over medium heat, combine the honey, sugar, and butter. Stir until the mixture is smooth and fully combined, then remove from heat.
4. Add eggs to the mixture
Let the mixture cool slightly, then add the eggs one at a time, whisking to incorporate each one. This will add structure and help bind the dough together.
5. Add dry ingredients to form a dough
Gradually add the flour mixture to the wet ingredients, stirring until a soft dough forms. It should be smooth and easy to handle.
6. Roll and bake the layers
Divide the dough into 8-10 equal pieces, rolling each one out into a thin layer. Bake each layer for 5-7 minutes or until golden brown. Let each layer cool on a wire rack before assembling.
7. Prepare the cream filling
In a mixing bowl, combine sour cream and sugar until smooth. This filling will be spread between the cake layers.
8. Assemble the cake
Place one layer on a serving plate, then spread a generous amount of cream filling on top. Repeat with each layer, spreading filling between each one. Allow the cake to chill for several hours or overnight.

Tips for a Perfect Medovik Cake
Creating the perfect Medovik cake can be a breeze if you follow a few helpful tips:
Flavor and Texture Tips
- Use high-quality honey: Since honey is the star ingredient, using a high-quality honey will enhance the flavor of your cake.
- Let the cake rest: Allowing the cake to sit in the fridge for at least 8 hours helps the layers soften and absorb the cream, creating a melt-in-your-mouth texture.
Common Mistakes to Avoid
- Avoid overbaking: Since the layers are thin, they bake quickly. Keep an eye on them to prevent burning.
- Don’t skip the resting period: This cake needs time to set; serving it too soon can result in a dry texture.
Variations of Medovik Cake
Once you master the traditional recipe, you can experiment with creative variations to make the cake your own.
Adding Fruits or Nuts
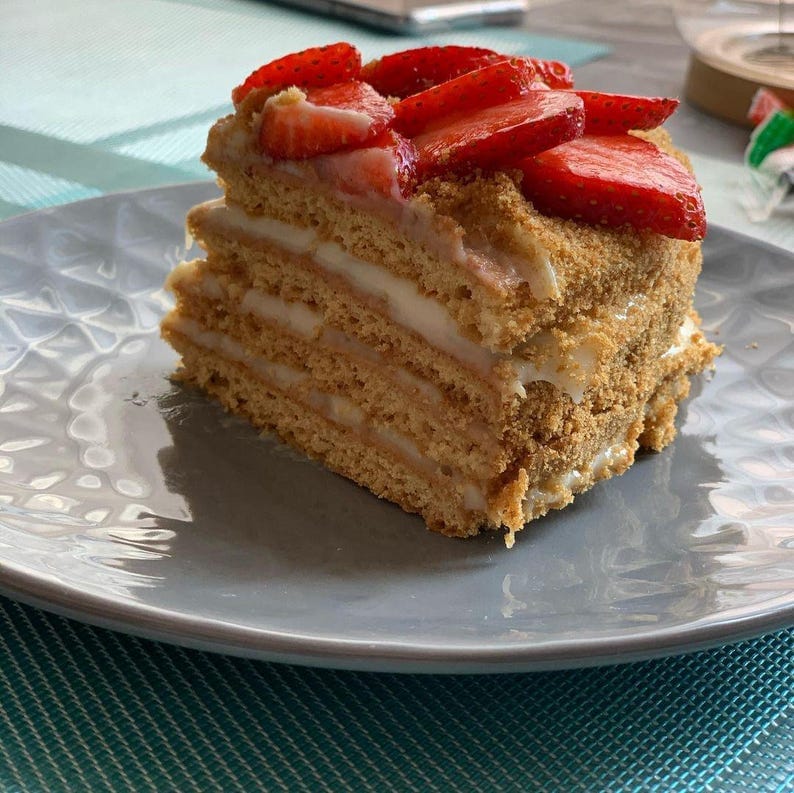
Add a layer of sliced berries or crushed nuts between each layer for added flavor and texture. Berries add a pop of freshness, while nuts add crunch and depth.
Alternative Fillings
While sour cream is traditional, you can also try a whipped cream or mascarpone filling for a richer flavor. These options make the cake even creamier and more luxurious.
Decorating Ideas
For a beautiful finish, sprinkle crushed cake crumbs or finely chopped nuts over the top layer, or drizzle with honey. You can also add fresh fruit or edible flowers to give your cake an elegant look.
Nutritional Benefits of Honey in Medovik Cake
While Medovik cake is undoubtedly a treat, honey brings some nutritional benefits to the table:
- Rich in antioxidants: Honey contains antioxidants that support overall health.
- Natural sweetness: Honey is a natural sweetener with a unique flavor that complements the cake’s creamy filling.
In moderation, honey can be a healthier alternative to refined sugar, offering a touch of nutrition along with its sweetness.
Conclusion
Medovik cake is a true celebration of flavors. With its delicate honey layers and creamy filling, this cake offers a taste of Eastern European tradition that’s hard to resist. Whether you’re enjoying it with family or serving it at a special gathering, Medovik is sure to impress. Baking it yourself allows you to customize the flavors and create a dessert that’s uniquely yours. So, why not give this classic honey cake a try? You’ll love the results—and so will everyone else!
Frequently Asked Questions (FAQ)
1. What does Medovik Cake taste like?
Medovik has a unique, mildly sweet honey flavor that’s balanced by a tangy, creamy filling.
2. How long can I store Medovik Cake?
You can store Medovik cake in an airtight container in the fridge for up to 5 days. The flavors actually improve with time as the layers absorb more of the filling.
3. Can I make Medovik cake ahead of time?
Yes! Medovik cake is even better when it’s made a day in advance. Allowing it to rest in the fridge overnight allows the flavors to meld together and creates a softer texture.
Call to Action
Ready to make Medovik cake part of your dessert repertoire? Gather your ingredients and give this classic recipe a try. Don’t forget to share your baking journey with friends or on social media and let everyone know how it turned out. With each bite, you’ll savor a little piece of tradition—and maybe even start a new family favorite. Happy baking!

